Skill Level
Easy / Beginner friendly
Step-by-step video tutorial: https://www.youtube.com/watch?v=ljZ13e46cW8
Materials
- 4mm crochet hook
- ≈500 (550, 600) m / 250 (275, 300) g of
Happy Place by Hobbii (or it’s alternative)
- Safetypins
- Darningneedle (optional)
- Stitchmarker (optional)
Gauge
10 cm x 10 cm in DC: 15 sts x 8 rows
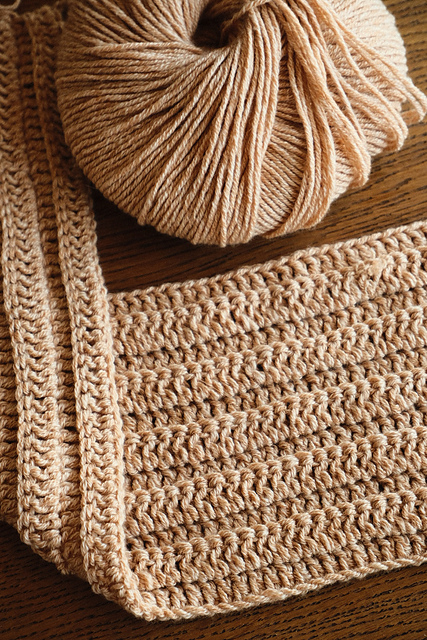
A 4 mm hook (rather than the 5 mm recommended on the label) gives a tighter, more opaque fabric. This is intentional.
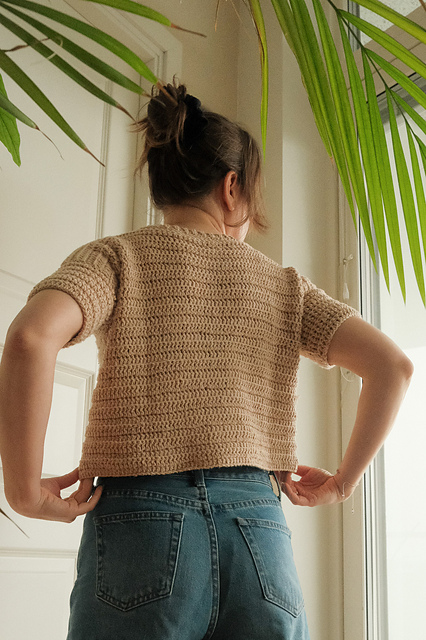
Pattern Overview
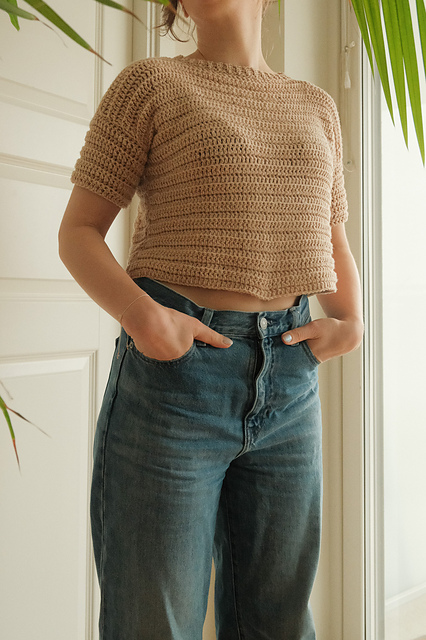
Body: Two identical panels, worked flat to create a ribbed texture (every row is worked in the back loop only).
Sleeves: Worked flat in the same way as the body to maintain the ribbed effect. Each sleeve is then sewn into a tube and attached to the body.
Finishing: A neat ribbed neckline worked directly onto the neckline opening.
Measurements
Bust: 88 (100, 112) cm
Flat width: 44 (50, 56) cm
Length: 40 (40, 43) cm
Sleeve circumference*: 30 (30, 32) cm
Length between edge of the neckline and sleeve end: 24 (27, 30) cm
* Sleeve circumference is given without ease. If you prefer a looser fit around the arm, consider adding a few extra stitches to your starting chain.
Abbreviation and terminology (US)
| Ch | Chain |
| DC | Double Crochet |
| SC | Single crochet |
| BLO | Back Loop Only |
| Sl st | Slip Stitch |
Detailed Instructions
BODY:
Make a foundation chain of 70 (80, 90) stitches.
Row 1:
- Ch2 (counts as first DC).
- DCBLO in the 2nd stitch of the previous row, then in each remaining stitch You should still have 70 (80, 90) DC in total.
- Turnyour work Row 2:
- Ch2 (counts as first DC).
- DCBLO in the 2nd stitch of the previous row, then in each remaining stitch You should still have 70 (80, 90) DC in total.
- Turnyour work
Repeat Row 2 until you have worked 29 (29, 31) rows in total. This gives approximately 40 (40, 43) cm in length. Do not fasten off.
If you want a longer tee, just add more rows. Each row should add approximately 1,25 cm.
If your work is getting narrower as you go, you may be losing the last stitch. Place a stitch marker in the turning chain to keep track of it!
NECKLINE SHAPING:
- Work20 (25, 30) DC BLO across (including the turning chain). Fasten off and
- Skipthe next 30 stitches for the neck
- Attachyarn to the next Ch 2 (counts as first DC), then work 19 (24, 29) DC BLO across. You should have 20 (25, 30) DC total on this side.
- Fastenoff and secure the
Once the first panel is complete, make a second panel in the same way.
SLEEVES:
Make a foundation chain of 40 (40, 43) stitches.
Row 1:
- Ch2 (counts as first DC).
- DCin the 4th chain from the hook, then DC in each remaining You should have 40 (40, 43) DC.
- Turnyour work Row 2:
- Ch2 (counts as first DC).
- DCBLO in the 2nd stitch of the previous row, then in each remaining You should still have 40 (40, 43) DC.
- Turnyour
Repeat Row 2 until you have worked 10 rows in total. Fasten off and secure.
Remember that on an oversized or fitted tee, the body panel itself forms part of the sleeve. If you want a longer sleeve, add more rows.
Sleeve circumference is given without ease. If you prefer a looser fit around the arm, consider going up one size for the sleeves, or adding a few extra stitches to your starting chain.
SEWING EVERYTHING TOGETHER:
1st step: Sew the sleeves into tubes
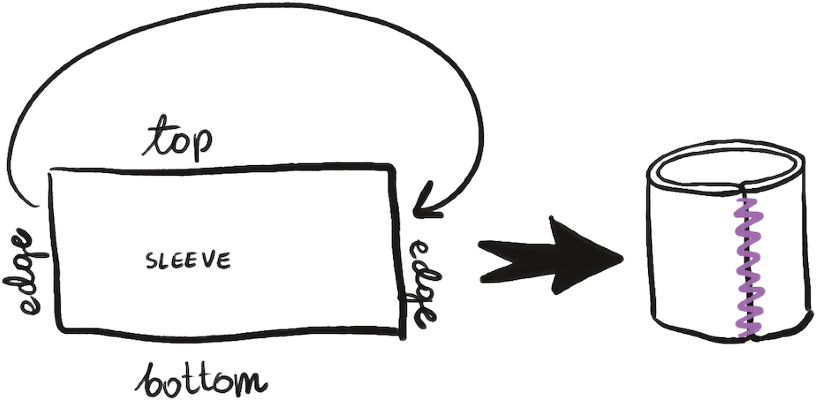
- Checkthe right side and wrong side of each sleeve
- Withwrong sides facing up, fold each sleeve in half lengthwise and sew the side edges together to create a tube.
- Usesafety pins to hold the edges together before This keeps everything aligned and makes sewing much easier.
2nd step: Join the body panels at the shoulders
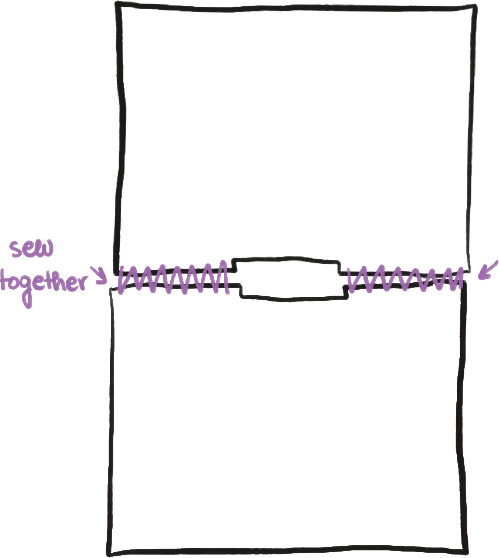
- Checkthe right and wrong sides of both body Place them with wrong sides facing up.
- Alignthe top edges and sew the shoulders together, leaving the neck opening
- Sewwith wrong sides facing so the seam will be hidden when the garment is turned right side out.
3rd step: Attach sleeves and sew side seams
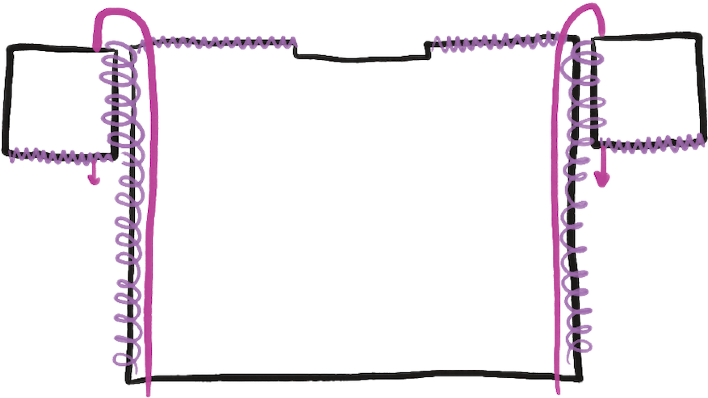
- With the main body still on the wrong side, take the sleeves (now sewn into tubes) and makesure they are also on the wrong side, with the seam at the bottom (under the arm).
- Alignone open edge of a sleeve with the side edge of a body Secure with safety pins.
- Alignthe side edges of both body panels, making sure the bottom hem edges are Secure everything with safety pins.
- Sew from the bottom hem upward along the side seam, continue around one side of the sleeveup to the shoulder, then sew back down, attaching the other side of the sleeve to the
- Repeatfor the second sleeve
NECKLINE:
Withthe right side facing, attach yarn to the edge of the neck
- Chain 2 and work 1 SC around the entire neckline, placing 1 SC in each stitch along the frontand back, and approximately 3 SC at each side corner (where the two panels meet).
- Jointhe round with a slip stitch to the first
NECKLINE RIBBED EDGE:
Watch step by step: https://youtu.be/ljZ13e46cW8?si=YbSVR72qy8LyMCiH&t=4156
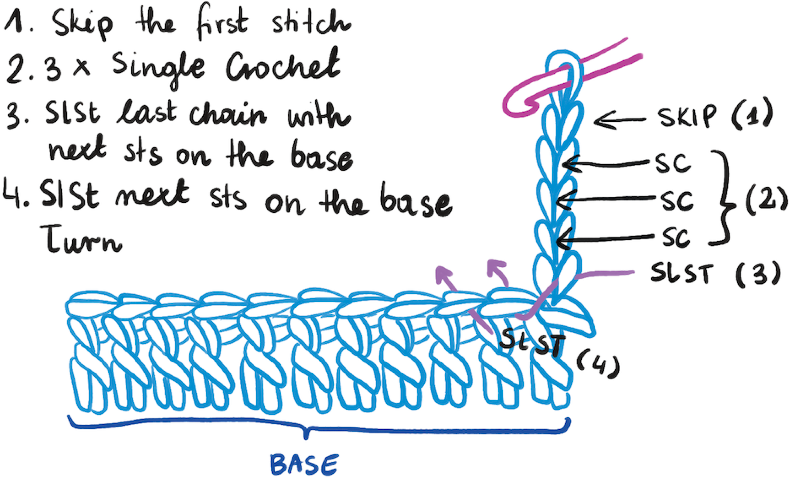
Ribbing is worked in rows perpendicular to the neckline, and attached to the neckline as you go.
Row 1:
- Ch5 (counts as 4 sts + 1 turning chain).
- SCin the 2nd chain from the hook, then SC in the next 2 You now have 4 SC.
- Slipstitch through the last chain and the next neckline stitch
- Slst into the following neckline stitch (look at the illustration below)
Row 2:
- Turn. Skip the first stitch.
- Workingin back loops only, SC in each of the 4 ribbing
- Chain 1
Row 3:
- Skip the first chain. SC in the 2nd chain.
- SCin back loops only across the 4
- Onthe last (4th) stitch: insert hook through the stitch and the next neckline stitch
- Slst into the following neckline
Repeat Rows 2 and 3 all the way around the neckline until you reach the beginning.
The 4th stitch is the corner stitch and it’s easy to miss! If you skip it, your ribbing will gradually lose stitches. Mark it with a stitch marker to be safe
Remember that the stitch you used for the slip stitch is already in use. Don’t accidentally work into it again on the next row, or you’ll end up with extra stitches.
CLOSING THE NECKLINE:
- Whenyou reach the start, align the first and last rows of
- Slipstitch through the back loops of both edges together to join them
- Fastenoff and weave in your